Blockchain in Javascript: Transfer Ether between Accounts
Set up and use web3.js for account transactions on the Ethereum Blockchain via a local Ganache instance


When I started learning about the Ethereum blockchain, the biggest eureka! moment I had was when I sent Ether between two accounts. What is fascinating is the simplicity of doing so in Javascript! In this article you'll learn how you can do the same in like 2 min.
Initial Setup
Test Ethereum Blockchain
Ain't nobody gonna buy actual Ether for learning this. We need a test blockchain with test accounts, preferably preloaded with ether.
For this, you can use either a combination of infura.io (test blockchain) + Metamask.io (test/actual accounts) or the really simple Ganache for both test blockchain + test accounts + test ether. You can install Ganache here.
When you run Ganache, it will look something like this:
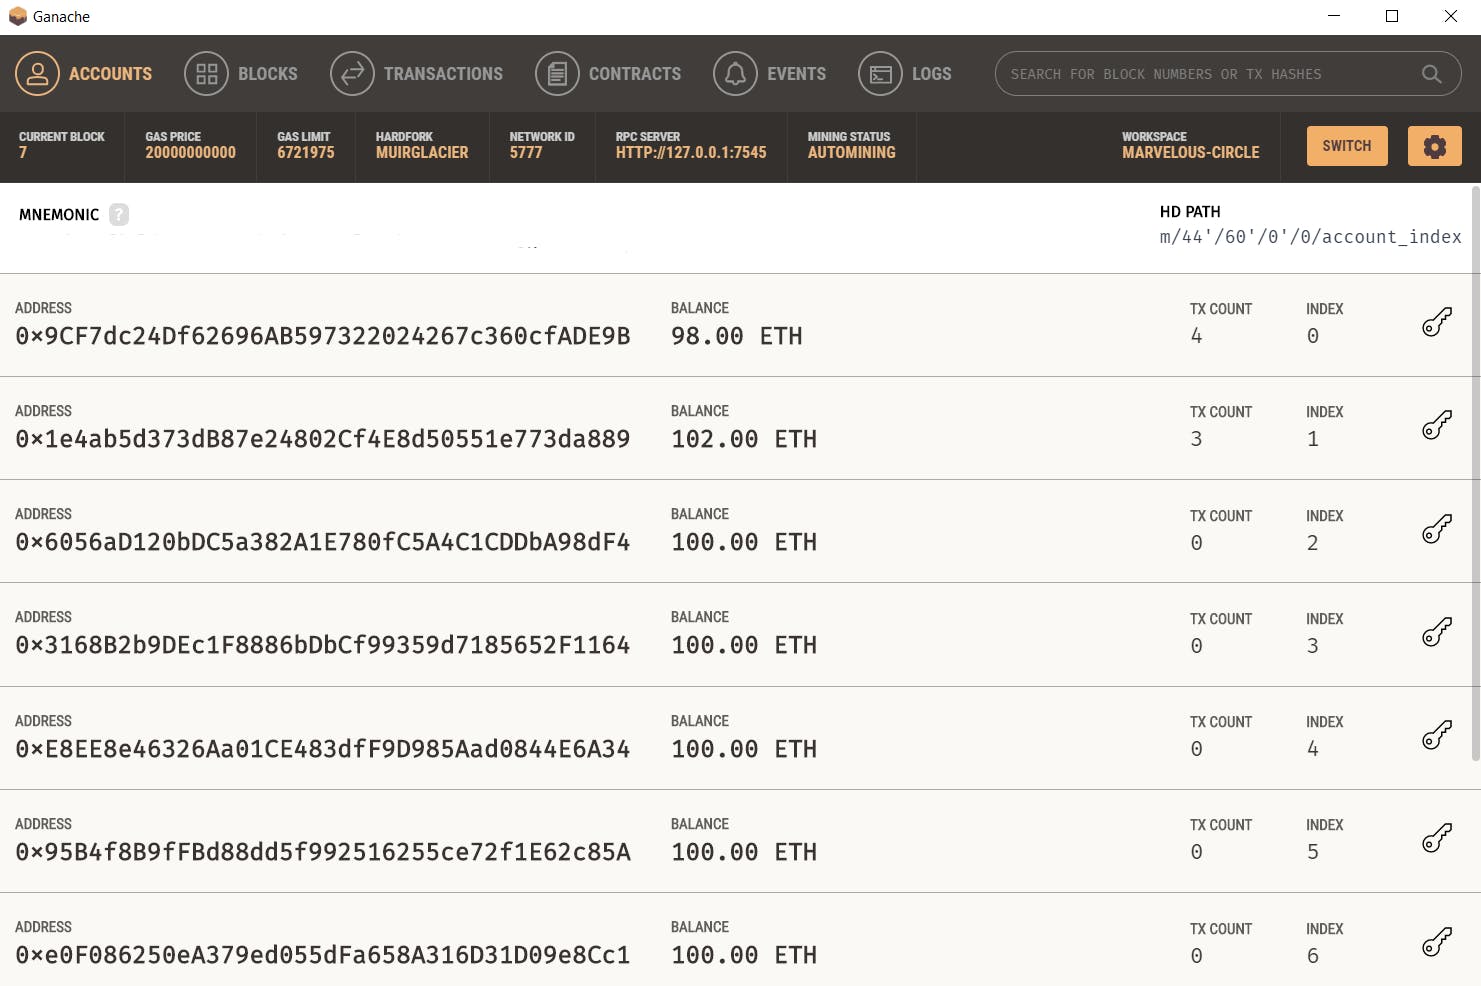
You'll get multiple accounts preloaded with 100 Ether each. I've made a few transactions already on my first two accounts hence the ether difference.
NodeJS
You can do what I'm about to show you even without NodeJS by using a CDN of the library we're using: web3. See web3js.readthedocs.io/en/v1.3.4/getting-sta...
But NodeJS makes things a bit simpler. And you can also add express if you want to create an API.
If you want to follow along with the same code as mine, make sure you have NodeJS installed.
The good stuff
Now that you have a test blockchain running with accounts overflowing with Ether, let's get down to business.
Initialize a new javascript project:
yarn init
or
npm init
and create a new file main.js.
We'll be using a library called web3.js, which is the Javascript SDK for interacting with the Ethereum Blockchain. Ethers is an alternative.
Install the web3.js library:
yarn add web3
or
npm install web3
Remember your running Ganache instance? Copy the RPC URL which should be in the top bar. It'll mostly be http://127.0.0.1:7545.
Moving forward
In the main.js file, we'll now require the web3 library and initialize a new object by passing the URL we got from Ganache.
const Web3 = require('web3')
const web3 = new Web3("http://127.0.0.1:7545")
Select any two accounts from Ganache and store their addresses in two variables from (The account we'll be sending ether from) and to (The account we'll be sending ether to). Mine will be different than yours.
For simplicity, also create a variable named value for storing the amount of ether to transfer. Let's say we want to transfer 1 ether, then the variable will look like:
const value = web3.utils.toWei("1", "ether")
Notice we are using web3.utils to convert 1 ether to Wei. Wei is the smallest unit of Ethereum cryptocurrency. 1 ether is 10 to the power 18 times one Wei 🤯
We need to convert to Wei since the function we're about to use accepts values in Wei.
We're going to simply call web3.eth.sendTransaction and pass it the from address, to address and the value, and we're good to go!
web3.eth.sendTransaction({from, to, value}, function(error, result) {
        if(error) console.log(error)
        else console.log(result)
});
The final code will look like this:
const Web3 = require('web3')
const web3 = Web3("http://127.0.0.1:7545")

// Use your local Ganache accounts for this
const from = "0x6056aD120bDC5a382A1E780fC5A4C1CDDbA98dF4"
const to = "0x3168B2b9DEc1F8886bDbCf99359d7185652F1164"

// Amount to transfer. Here, 1 ether
const value = web3.utils.toWei(1, "ether")

web3.eth.sendTransaction({from, to, value}, function(error, result) {
        if(error) console.log(error)
        else console.log(result)
});
Now when you run your code with node main.js, it should return a transaction hash if the transfer was successful.
Check Ganache, it'll reflect the change and you've successfully made a transaction on the Ethereum blockchain! 🥳🥳🥳
